Blog

Blog

Ceramic vs Porcelain

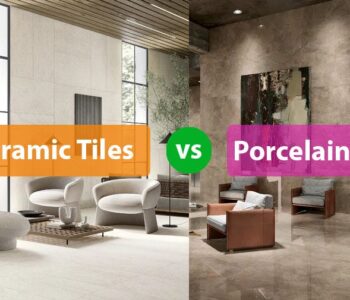
While both porcelain and ceramic tiles are types of tiles made from clay and fired in a kiln, they differ primarily in their composition and manufacturing process, leading to variations in durability, water absorption, and suitability for different applications.

Here’s a clear breakdown of ceramic tile, porcelain tile, and hardbody tile—including what makes them similar or different:

Ceramic Tile

  • Material: Made from natural clay, sand, and water.
  • Firing Temperature: Fired at lower temperatures than porcelain.
  • Porosity: More porous than porcelain—absorbs more water (typically >3% water absorption rate).
  • Durability: Less dense and softer; better for walls or low-traffic floors.
  • Finish: Usually has a glaze on top that gives colour and protection.
  • Use: Best for indoor walls and light-use floors.

Porcelain Tile

  • Material: A subtype of ceramic, but made from more refined clay and fired at higher temperatures.
  • Firing Temperature: Much higher than ceramic tile.
  • Porosity: Very low porosity—typically <0.5% water absorption (often considered “impervious”).
  • Durability: Harder, denser, more durable—resists wear, moisture, and temperature changes better.
  • Appearance: Can be glazed or unglazed; often mimics stone, wood, or concrete textures.
  • Use: Suitable for floors, outdoor areas, high-traffic zones, and wet spaces.

Hardbody Tile

  • Definition: A general term (used in some regions or trade circles) for high-density non-porcelain ceramic tiles—essentially, a dense ceramic tile that is harder than standard ceramic but not quite porcelain.
  • Porosity: Lower than standard ceramic, but not as low as porcelain.
  • Durability: More durable than regular ceramic, but not as refined as porcelain.
  • Use Case: Used where more strength is needed than basic ceramic, but full porcelain performance isn’t required.
  • Use: Often found in commercial spaces, corridors, or residential floors needing a tougher surface.

Summary Table

TypeWater AbsorptionStrengthCommon Uses
Ceramic Tile>3%ModerateWalls, light traffic floors
Porcelain Tile<0.5%HighHigh traffic, wet / outdoor
Hardbody Tile1-3% (varies)MediumFloors, moderate traffic aread

Measure Tile Area

Square meters are the unit of measurement used to calculate the total surface area you need to cover with tiles. Boxes are the packaging units in which tiles are sold. To determine how many boxes you need, you first calculate the square meters of your project area, then find out the coverage area per box of your chosen tiles (found on the box itself). Finally, divide the total surface area by the square meterage of one tile box to find the number of boxes to buy, rounding up to the nearest whole number.

1. Calculate the room’s square meterage

If your room is square or rectangular, measuring is simple. Using a tape measure, find the length and width of the room, wall, or other area in meters. Finally, multiply the length and width to get the room’s measurement in square meters. If your area has obstacles like doors or windows that won’t be tiled, calculate their square meters and subtract them from your total.

If you have an oddly shaped room, you’ll need to break it into multiple shapes and measure them separately. For example, if you have an L-shaped room, you can separate it into two rectangles. Measure the length and width of each rectangle using the instructions for square and rectangular rooms above. Once you have the measurements for both shapes, multiply the length and width of each rectangle. Add the two resulting numbers to get the total area.

2. Add a buffer for waste

This is where the saying “rather be safe than sorry” comes into play. You should never buy just the number of tiles you need because you will always need extra tiles for any cuts, waste, breaks and mistakes. It is standard practice to add 10–15% to your total square meters to cover for this. A higher percentage may be needed for complex layouts like a herringbone pattern. Calculation: Total area x 1.10 = Adjusted area.

These extra tiles will come in handy in the event something unanticipated occurs. And there’s a lot that can go wrong with tile installation! Your tiles could arrive broken, or you could accidentally drop one when unboxing. Tiles can also come loose after installation. You may also need extra tiles to break into fragments for areas where a full tile won’t fit. Additionally, having extra tiles is useful in case the tile you choose is discontinued or raises in price over the next few months or years. If you buy extra, you can save yourself the frustration and heavy expenses that come with needing to replace tiles in the future. Rather spend a little bit more up front to save money in the long run.

3. Determine the number of boxes

The number of square meters in a box of tiles varies depending on the tile size and manufacturer; for example, a box of 600x600mm tiles might contain 2.16 m², while a box of 500x500mm tiles could have 2.00 m². To find the exact amount, you need to check the specific product’s packaging or specifications, as even tiles of the same dimensions can come in different quantities per box.

Divide the total square meterage needed (total area plus waste buffer) by the square meters per box and round the result up to the next whole number.

Now that you know how to decide how much tile your floor needs, you can tackle your renovation with confidence. Measure your room, choose your favorite tile design, and transform your room with a quick and easy installation. As long as you measure your room accurately and account for overage, you’ll be fine.

Tiles Calculator

Use the below tiles calculator to work out the number of boxes required to tile the measured area.

Up to 3 areas can be calculated in one. If areas 2 and/or 3 are not used, please enter a zero for both the length and width of the area.

Area 1:
Room length
m
Room breadth
m
Area 2:
Room length
m
Room beadth
m
Area 3:
Room length
m
Room beadth
m
Tiles
Wastage
%
Tile length
mm
Tile breadth
mm
Box size
tiles/box